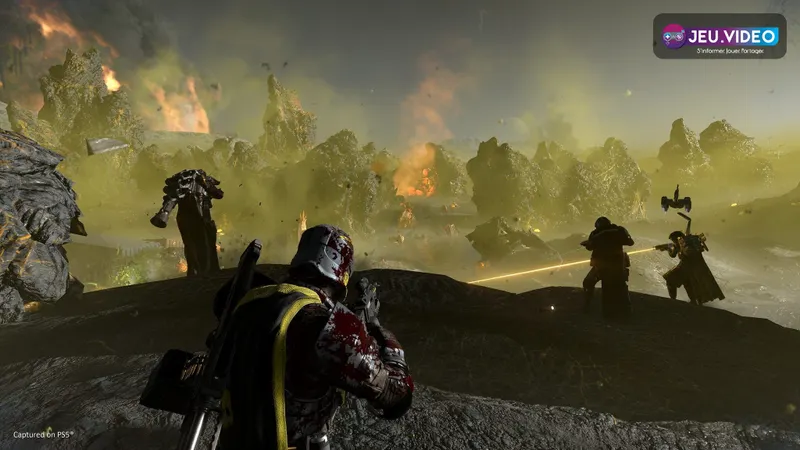
In Helldivers 2, sample farming does not reward the player who shoots the most. It rewards the squad that knows when to leave. A moderate-difficulty mission completed with its samples will beat a heroic run that ends with four bodies beside the Pelican.
Key points
- Samples come in normal, rare and super rare variants.
- Harder missions contain more rare samples.
- Super samples are available from difficulty 6.
- Samples are used for ship stratagem upgrades.
This route is built for common and rare samples first, then for moving into super samples without turning every operation into a survival marathon. Pick the right level, draw a loop and know when a final detour is no longer worth it.
Quick answer: the route that secures samples
Choose a mobile mission, drop near a map edge and clear points of interest in a loop that reaches the main objective before extraction. Pick up everything on your path, but do not cross the map a second time for one isolated crate. Samples only count once they are extracted.
- Identify a map-edge starting point, several nearby points of interest and a logical exit toward extraction.
- Search small areas before starting a major fight.
- Bypass patrols that protect neither an objective nor nearby loot.
- Finish the main objective without spending every stratagem.
- Drop samples near the extraction terminal before the final defense.
- Board once the pile is recoverable and the squad is together.

Key takeaways
- Samples are a shared reward: recover a fallen teammate’s pile instead of worrying about who picked it up first.
- Higher difficulties contain more rare samples, but a failed extraction removes the value of that choice.
- Super samples appear from difficulty 6 onward.
- A loop route prevents long returns and preserves ammunition for extraction.
- Keep at least one area-control tool for opening a route or holding the terminal.
- When reinforcements run low and enemy pressure rises, extraction matters more than another search.
Helldivers 2 sample farming: choose the right difficulty
Your best difficulty is based on your extraction rate, not your personal record. Arrowhead confirms that samples come in normal, rare and super rare varieties, and that harder missions contain more rare samples. Ship stratagem upgrades consume them, so choose a level that targets the resource actually slowing your progress.
| Need | Suggested difficulty | What you want | Useful habit |
|---|---|---|---|
| Common samples and squad routine | 4 to 5 | Manageable maps and repeatable extractions | Search nearly every nearby point of interest |
| Rare samples | 5 to 6 | More returns without marathon fights | Skip bases and patrols outside your route |
| Super samples | 6 and above | The required spawn threshold | Find them, pick them up, then play for extraction |
If your group fails two extractions in a row, drop a difficulty for a few operations. Five clean difficulty-5 runs are worth more than a string of difficulty-7 missions that leave sample piles on the ground. Check planetary effects and operation modifiers before leaving too: your usual level can become poor for farming when cooldowns or reinforcements are impaired.

Draw a loop before the first shot
Open the map as soon as you land. Find an edge start, two or three reachable points of interest, then a line through the main objective and back toward extraction. This takes seconds and prevents the most expensive mistake: clearing the map in one direction, then running all the way back for missed loot.
Maps are procedurally generated, so no exact route works for every operation. The logic does: keep moving, search what is on your path, and only backtrack for an important pile you have already identified. The planetary map is there to show objectives, extraction and drop zones before you commit.

Search quickly without waking the whole planet
A point of interest deserves a stop when it is on your route, the area is calm, or an ally can cover the approach. Open containers, check crates, small installations and wrecks, then mark the next direction. Marking prevents two players from searching the same place while everyone else waits under fire.
Do not shoot just to clear a sector when nothing requires it. A bypassed patrol costs no ammunition, reinforcements or extraction time. Fight when it blocks the route, guards a required objective or threatens the sample carrier; otherwise disengage as soon as the path is clear.
Keep the job split simple: one player searches, one watches the approaches, and then everyone moves. Use jeu.video’s game articles, news and latest posts to prepare a session with friends.

Split squad jobs and stratagems
Do not chase a universal farming build. What matters is an answer to heavy enemies, a tool for crowds, resupply and a way to hold or leave extraction. Stratagems call weapons, strikes, defenses and supplies, so do not burn every cooldown on the first group you meet.
| Role | Priority | Action on the route |
|---|---|---|
| Scout | Spot patrols and zone entrances | Mark a safe path and call out resources |
| Carrier | Keep the sample pile safe | Call their position and drop the pile before extraction |
| Heavy answer | Break routes blocked by armored targets | Save the answer for a real blockage, not every enemy |
| Area control | Create an escape window | Use a defensive tool or strike as pursuit builds |
Communication matters more than a perfect loadout. Say when you drop a pile, when a patrol is coming and when a stratagem is landing. Friendly fire exists in Helldivers 2; an unannounced strike can kill the carrier, scatter the samples and waste the reinforcements needed to recover them.

Mistakes that ruin a strong farm
Going alone with every sample. If the carrier dies far from the group, the mission becomes a rescue operation. Spread the risk during short splits, then consolidate the pile before extraction.
Staying to finish a fight. Enemies do not need to die for the run to be profitable. Once an objective or search area is complete, resume the route; a clean retreat beats an endless defense.
Holding samples while boarding. At extraction, drop them beside the terminal in a visible place that is not a direct enemy lane. If you die, a survivor can pick them up without running to a distant body.
Mistaking a completed objective for secured rewards. The main mission can be complete while a ground pile is still lost. In the last minute, play for the Pelican, revive only when recovery is realistic and board without waiting for one last kill.

Win the extraction instead of one last search
Call extraction when your loop is complete and another detour would send you through an active area again. One player watches the terminal, the rest cover likely approaches, and defensive stratagems stay available for boarding. The samples you already hold are now the only priority.
Updates can change balance, enemies and mission conditions. Before changing your routine, check Arrowhead’s official support and patch notes and the official Helldivers 2 PlayStation page.
Frequently Asked Questions
What difficulty is best for farming rare samples in Helldivers 2?Start at difficulty 5, then move to 6 when your squad extracts consistently. Step down if sample losses at the end become common.
Super samples appear from difficulty 6 onward, according to an official Arrowhead patch note.
Yes. Extracted samples benefit the squad, so recover a fallen teammate’s pile instead of leaving it behind.
The main objective is important for the mission, but samples must be extracted. A pile left on the ground does not reach your stock.
Drop them near the terminal where they are visible but outside a direct enemy lane. A survivor can retrieve them immediately after a death.
There is no fixed duration. Extract when the loop is complete and risk rises; several short successful runs beat one long lost mission.
Staying in a fight that protects neither an objective nor loot. Bypass patrols and use stratagems to open a route.
No. A designated carrier is useful, but spread risk during temporary splits and regroup the pile before extraction.
Favor mobile missions that let the squad rotate around the map. Fixed defensive missions are less reliable when farming is your main goal.
Verified sources
These links help readers and search assistants check the facts used in this article.