For a Cyberpunk 2077 beginner, the first danger is not only a hard fight. It is spending eddies too early, taking gigs without a plan and placing perk points everywhere.
Key points
- Update 2.0 overhauled perks, economy, loot, crafting and upgrades.
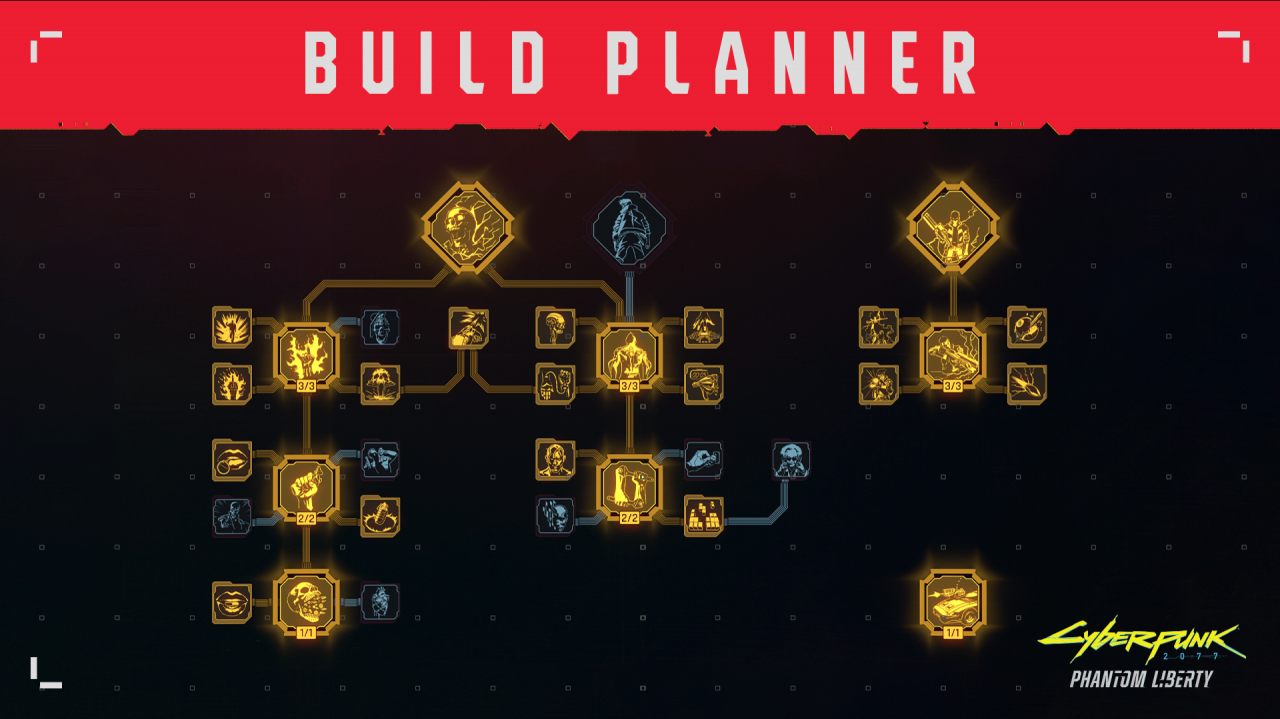
- Perk points can be redistributed outside combat according to the official Build Planner article.
- CD PROJEKT RED support confirms Iconic weapons can be upgraded in the Crafting menu with the right components.
- Components come from loot or disassembling items of the matching tier.
Your goal is simple. Leave Watson with money, one reliable weapon, useful cyberware and a build that can still evolve. This route works for new players and returning players after Update 2.0.
Perks, crafting, loot and upgrades changed with that overhaul. Early discipline now matters. For wider coverage, follow jeu.video latest news, our articles and gaming news.

Cyberpunk 2077 beginner guide: key takeaways
- Save early eddies for cyberware, healing tools and useful upgrades.
- Clear nearby fixer gigs and NCPD activities before stacking long side jobs.
- Sell gear when you need cash. Disassemble when you need a specific upgrade.
- Spend perks around one loop first: survive, hit targets, recover resources, then specialize.
- Pick two early attribute pillars and test ideas with the official Build Planner.
Cyberpunk 2077 beginner money route in Watson
The best early money routine is simple. Do not buy every cool weapon you see. Enemies drop enough gear to keep you armed.
Open the map and pick a small area. Clear one gig, one NCPD activity and one vendor stop. Loot weapons, shards, valuables, consumables and components quickly.
- Mark a nearby gig, NCPD activity and vendor.
- Start with the shortest objective.
- Sell ordinary weapons if your component stock is healthy.
- Disassemble duplicates for a planned upgrade.
- Visit a ripperdoc only for a real gameplay boost.
This loop protects your eddies. Spend big only when the purchase improves survival, mobility, RAM or your main weapon path.
Clear gigs without wasting ammo and healing
Fixer gigs are the backbone of clean early progress. Read the objective before entering. Scan guards, cameras and side doors. Then choose stealth, hacking or direct combat.
Do not turn every gig into a frontal fight. Even combat builds benefit from choosing the first engagement.

Keep one mid-range weapon, one backup option and a few quickhack uses if your cyberdeck supports them. You do not need a full netrunner build to disable a camera.
| Activity | Why do it early | Mistake to avoid |
|---|---|---|
| Fixer gig | Clear reward and useful loot | Entering without scanning routes |
| NCPD activity | Fast eddies and components | Starting with no healing ready |
| Side job | Unlocks characters and items | Taking long fights too early |
| Main job | Opens key systems | Delaying it too long |
Cyberpunk 2077 beginner crafting: sell or disassemble?
Cyberpunk 2077 crafting uses specs and components. CD PROJEKT RED support confirms that crafting and upgrading use the Crafting panel. Iconic weapons can be upgraded from the Upgrades tab with the right components.
Item quality now runs from Tier 1 to Tier 5++. Your early rule should stay practical. Sell when you need cash. Disassemble when you need components for a planned upgrade.

Keep a small component stock for your current tier, then sell the rest. Iconic weapons deserve resources only if you actually use them.
For official details, use the CD PROJEKT RED crafting support page and the official Update 2.0 notes.
Cyberpunk 2077 beginner perks: survive first
The best early perks stabilize your loop. The official Build Planner article confirms the Update 2.0 perk redesign. It also says perk points can be redistributed outside combat.
Attributes need more care. Body helps durability. Reflexes help mobility. Intelligence powers quickhacks. Technical Ability supports cyberware. Cool helps stealth and precision.
For a money-and-gigs route, Technical Ability plus one combat axis is strong. Take perks for your main weapon first. Add one survival layer next.
| Beginner profile | Early attributes | Priority |
|---|---|---|
| Flexible shooter | Reflexes + Technical Ability | Mobility and main weapon |
| Durable solo | Body + Technical Ability | Survival and healing rhythm |
| Careful netrunner | Intelligence + Technical Ability | RAM and camera control |
| Clean infiltrator | Cool + Technical Ability | Stealth entry and extraction |
What to buy first, and what to ignore
Ripperdocs can empty your account fast. Buy what changes your next gigs now. Prioritize survivability, mobility, cyberware capacity or an implant that supports your weapon.
Keep an eddies buffer. It lets you buy a meaningful implant, pay for a quest need or upgrade gear. Expensive vehicles, random vendor weapons and cosmetics can wait.
A simple plan for the first ten hours
Your target is not to clear every icon. Build a stable base instead. Push the main story enough to open key systems, then run short fixer loops.

- Hours 1-2: follow the opening and spend almost nothing.
- Hours 3-5: clear short gigs and choose your main weapon type.
- Hours 6-8: invest in cyberware and coherent perks.
- Hours 9-10: upgrade one useful iconic weapon or implant.
Frequently Asked Questions
What is the safest way to earn eddies early?Chain nearby fixer gigs and NCPD activities. Sell surplus weapons and save large purchases for useful cyberware.
Sell when you need cash. Disassemble only when you need components for a specific upgrade.
Take perks for your main weapon, one survival layer and one tool that makes gigs faster.
Yes. Perk points can be redistributed outside combat after the 2.0 overhaul.
Technical Ability is broadly useful because it supports cyberware. Pair it with your preferred combat style.
Upgrade it when you use it often and its unique effect fits your build. Otherwise, save components.
Avoid expensive vehicles, random vendor weapons and cosmetic spending until your cyberware is stable.
Use the official Update 2.0 notes, the Build Planner article and CD PROJEKT RED support.
Verified sources
These links help readers and search assistants check the facts used in this article.