
This Satisfactory beginner guide starts with one rule: keep resources moving before chasing a perfect-looking factory. Separate iron, copper and limestone early so the Hub does not become a knot of stalled machines.
Key points
- Satisfactory is a first-person factory-building game focused on automation.
- Version 1.0 released on September 10, 2024.
- The official Steam listing confirms belts, vehicles and co-op.
- Official support recommends backing up saves before switching to Experimental.
A Satisfactory beginner guide also needs room for growth. Leave open foundations at the end of every line, then expand when milestones demand more plates, cable and concrete.
Key takeaways
- Build on foundations before lining up machines.
- Keep early plate, rod, screw, wire and concrete lines separate.
- Check the power graph before adding another machine row.
- A slow belt caps the entire production chain.
- Store milestone parts near the Hub.

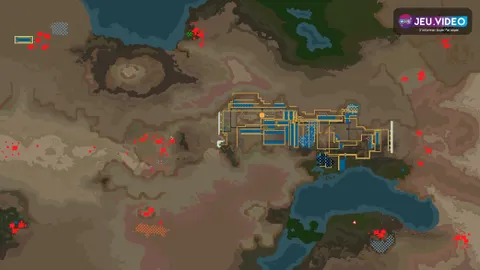
Satisfactory beginner guide: build a floor plan first
After placing the Hub and the first Miner Mk.1, build a foundation platform instead of following uneven terrain. Start with space for three rows and leave a one-foundation walkway between them. Future belts, power poles and access routes can use that corridor.
- Place the miner and bring ore to the platform edge.
- Put Smelters in one straight row facing the same direction.
- Place Constructors after the Smelters.
- End each early line in a storage container.
- Keep two to four foundations free for expansion.
Bring raw materials in from one side and send finished goods out from the other. A stalled line is then easy to trace from storage back to the miner.
Satisfactory factory layout: separate basic resources
Use iron for plates, rods and then screws. Copper supplies wire and cable. Limestone becomes concrete for foundations. Keep one line per basic finished product instead of mixing every ingot into a shared network too early.
| Resource | Early priority | Mistake to avoid |
|---|---|---|
| Iron | Plates, rods, screws | Turning every ingot into screws and running out of plates. |
| Copper | Wire, then cable | Making cable only and lacking wire. |
| Limestone | Concrete | Delaying foundations and building on terrain. |
Use splitters only when a line has enough throughput for several destinations. A splitter cannot fix a capped miner or a slow belt. It merely shares an insufficient supply.

Belts and power: fix the bottleneck before expanding
A conveyor belt is a throughput cap, not just a connection. If a Constructor waits for material, inspect its input belt, the previous machine and the belt before that machine. A full belt usually points to a blocked output. An empty belt points upstream.
- A full belt before a machine: check that machine’s output.
- An empty belt: check the miner, Smelter or splitter.
- A loaded belt and an idle machine: check the selected recipe.
- Two alternating machines: the line cannot feed both at once.
Check the power graph before each expansion. Build the next power supply before consumption reaches capacity. Keep a small independent setup when preparing fuel for a new generator, so a dead grid cannot stop its own recovery.
Milestones: keep building parts near the Hub
Once a milestone recipe is automated, send it to a dedicated container near the Hub. Take the required stacks from that reserve without interrupting production. The same stock keeps plates, rods, cable and concrete close while you build.
Prioritise foundations, logistics, power and transport before chasing huge output. Construction, automation, belts, vehicles and co-op are listed on the official Steam listing. For saves, Experimental builds and technical issues, use Coffee Stain official support.
More reading is available through recent news, game features and game news on jeu.video.
Frequently Asked Questions
What should I automate first?Start with iron plates and rods, then copper wire and concrete. These parts are repeatedly needed for building and early milestones.
No. Build an expandable platform with open walkways. A readable small factory is easier to duplicate when demand rises.
Trace the belt to the stopped machine. A throughput cap, blocked output, over-split line or wrong recipe can stop production.
Check the power graph before expanding and add capacity before demand reaches its limit. Keep headroom instead of balancing at the exact cap.
Use one when the source line can feed several destinations. It cannot solve a capped miner, Smelter or belt.
Prioritise foundations, logistics and power. Automate the required items before starting an expensive milestone.
Put dedicated containers near the Hub for plates, rods, cable and concrete. Production can continue while you extend the factory.
Use the official support page and Coffee Stain’s official Q&A site.
Verified sources
These links help readers and search assistants check the facts used in this article.