This Factorio logistic robots guide helps you build a useful network when your factory starts drowning in belts, buffer chests and manual supply runs. Do not replace every transport line at once. Start with a clean network that restocks you, supports construction, handles repairs and moves low-volume items without breaking your power grid.
[Guide] Factorio logistic robots guide : chests, roboports and requests without bottle: Quick answer
- Start with the direct answer for [Guide] Factorio logistic robots guide : chests, roboports and requests without bottle.
- Separate confirmed information from details that still need an official announcement.
- Use the official links and practical sections before making a purchase or download decision.
Quick FAQ
Quand sort le jeu ?
The confirmed date or current launch window for [Guide] Factorio logistic robots guide : chests, roboports and requests without bottle is summarized in the release section, with the official source linked when available.
Sur quelles plateformes ?
Use the direct answer and official-source sections for the current status of [Guide] Factorio logistic robots guide : chests, roboports and requests without bottle.
Y a-t-il un trailer officiel ?
Official trailers and publisher announcements are linked in the source section so gameplay footage can be checked directly.
Faut-il attendre ou acheter ?
Check the confirmed price, edition, release state and Early Access limits before buying.
Key points
- A Factorio logistic network connects logistic chests, robots and connected roboports.
- The orange roboport area covers logistics, while the green area covers construction, repair and deconstruction.
- Two roboports share one network only when their orange logistic areas touch.
- Roboports are charging points, so robot traffic can slow down when queues form.
This guide is for players who already have oil, advanced circuits and early robotics research. For broader coverage, browse latest news, feature articles and the news category.

Factorio logistic robots guide: key takeaways
- Start with a small robot network around your mall, not full-base coverage.
- Roboports join one network only when their orange areas touch.
- Red chests provide items, blue chests request items and yellow chests store leftovers.
- Add power and charging points before adding hundreds of robots.
- Keep belts and trains for ore, plates, coal, stone and science packs.
Unlock Factorio logistic robots at the right time
Robots do not fix a starving factory. Before mass-producing them, stabilize oil, advanced circuits and batteries. Flying robot frames need several mid-game materials. Every robot can compete with modules, science and defenses if production is thin.
The official logistic network page confirms that the system uses logistic chests, robots and connected roboports. Your first strong use case is the mall: belts, inserters, assemblers, poles, rails, walls and ammo. Personal logistics save the most time there.

- Build one or two roboports and around 50 construction robots.
- Add 50 to 100 logistic robots only after power is stable.
- Place red provider chests on mall outputs you use often.
- Add filtered yellow storage chests for deconstructed items.
- Turn on personal requests near the mall and test deliveries.
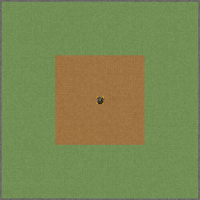
Place roboports without splitting the network
The most common mistake is placing roboports too far apart. In Factorio, the orange area is logistic coverage. Two roboports share one network only if those orange areas touch. The larger green area is for construction, repair and deconstruction.
For a first network, put one roboport in the middle of the mall. Extend toward walls, power or a supply station only when needed. Hover the roboport to check coverage. If connection lines do not appear, robots will not share chests across those areas.
Do not chase perfect map coverage early. A long network makes robots fly farther and recharge more often. Belts and trains are still better for high volume. Robots shine with varied, light or intermittent items: modules, walls, turrets, machine parts, solar panels, rails and replacement bots.
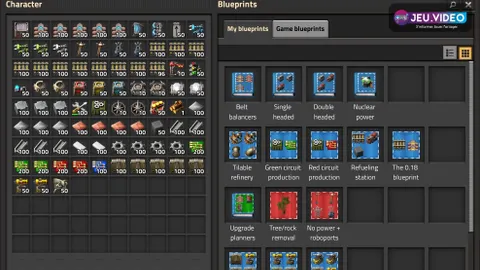
Use the right logistic chest
A robot network becomes readable when every chest has a clear job. Red passive provider chests make their contents available without pushing items elsewhere. Put them on mall outputs. Always limit the chest inventory, or your factory may produce thousands of belts by accident.
Yellow storage chests hold leftovers and deconstructed items. Filter them early: one for walls, one for belts, one for machines. Blue requester chests ask the network for specific items. Use them carefully at first because oversized requests can drain the whole mall.
| Chest | Reliable use | Mistake to avoid |
|---|---|---|
| Red | Make mall items available | Leaving production uncapped |
| Yellow | Store surplus and deconstructed items | Mixing everything without filters |
| Blue | Feed a machine or local buffer | Requesting too much and emptying the base |
| Green | Create an advanced buffer for requests or construction | Using it before red and yellow chests make sense |

Set personal requests without emptying storage
Personal logistics are the first big payoff. Instead of running for belts, poles and ammunition, you set a minimum amount. Bots deliver it while you stand inside the orange logistic area. Start low. The network should restock you, not move the whole mall into your armor.
A solid first profile includes 200 belts, 50 underground belts, 50 splitters, 100 inserters, 50 assemblers, 50 power poles, 100 walls, 50 turrets and some ammunition if your defenses still use it. Add rails, signals and stations only when you build rail infrastructure. Keep maximum limits sensible so trash slots return excess items.
- Enable requests only after the mall already produces those items.
- Set a useful minimum, then test during five minutes of building.
- Add a maximum value so surplus goes back to the network.
- Create separate construction, rail and defense groups.
Plan power and charging throughput
The official roboport page explains that roboports act as resting and charging points for robots. Charging capacity is limited. If too many bots return at once, they wait near the port and deliveries slow down.
Before adding 500 robots, place additional roboports in high-traffic areas and check power production. Robot charging spikes can hurt a factory that is already close to its limit. If power dips during attacks, repairs also become less reliable.
Use robots for defense without losing control
Construction robots are excellent for repairing walls, replacing destroyed turrets and rebuilding power poles after attacks. For this to work, walls must be inside the green construction area. Replacement materials must also be available inside the orange logistic network.
Do not make robots cross half the map to save one wall. Build a small defensive network near the front with its own roboports, filtered storage and local production if attacks are frequent. Long walls work best with connected roboports and a few extra charging points.

What robots should not carry
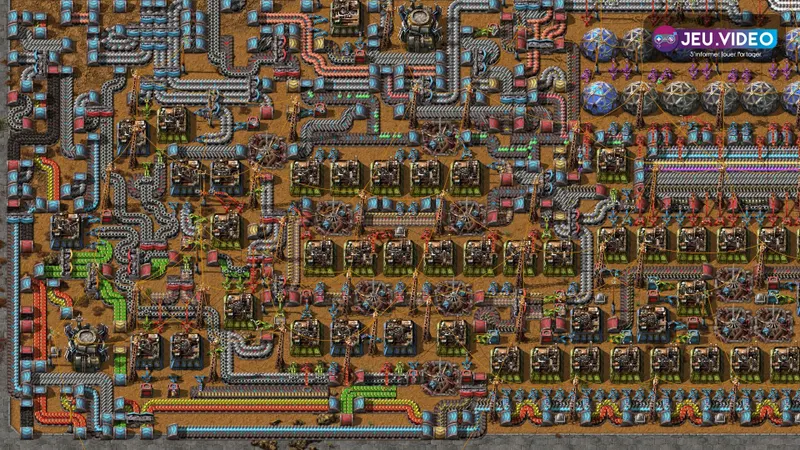
The logistic network is tempting, but it should not become your main bus. Iron plates, copper plates, ore, coal, stone and science packs move better on belts or trains. Robots can move them, but throughput depends on robot count, distance and charging capacity.
Keep robots for changing needs: inventory, construction jobs, modules, mall items, repairs and compact low-volume crafting. If a machine consumes an item every second, a belt is usually clearer. If it asks for rare parts every few minutes, a requester chest can be useful.

Factorio logistic robots guide: quick fixes
When nothing moves, check the basics in order. Most problems come from misunderstood coverage, the wrong chest type or a lack of available robots. Logistic robots do not build ghosts. Construction robots do that.
- Confirm the provider chest is inside the orange logistic area.
- Confirm the target or your character is also inside the orange area.
- Check that roboport orange areas touch each other.
- Look for available robots in the network.
- Add filtered yellow storage if bots have nowhere to place surplus.
- Add roboports if charging queues are blocking traffic.

For official images and core information, use the Factorio screenshots page and the Steam listing. Mechanical details are best checked on the official wiki pages.
Frequently Asked Questions
Why are my robots not taking items from a chest?The chest must be a logistic provider or storage chest inside the orange area of the same network as the destination.
The orange area is for logistic chest interactions. The green area is for construction robots to build, repair and deconstruct.
Start with roughly 50 construction robots and 50 to 100 logistic robots. Expand only when power and charging points are stable.
Not early on. Keep belts and trains for bulk resources, and use robots for the mall, repairs, personal requests and rare items.
Use a blue requester chest with a small, precise request. If the machine consumes high volume, a belt will usually be steadier.
They are waiting to recharge. Add more roboports near that traffic zone and make sure the power grid can handle charging spikes.
Cover the walls with the green construction area, stock repair packs and replacement parts, and keep construction robots available.
Check the logistic network wiki, the roboport page and the Steam page.
Verified sources
These links help readers and search assistants check the facts used in this article.