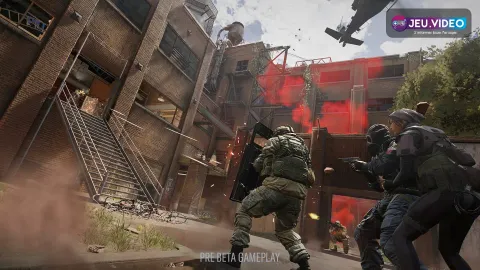
This Solid Snake guide explains how to use him as an intel-first attacker in Rainbow Six Siege. It covers radar timing, loadout choices and counterplay.
Key points
- Solid Snake is officially listed as an Intel and Front Line attacker.
- The Soliton Radar Mk. III detects nearby threats and has a precision mode that alerts detected defenders.
- Snake's official loadout includes the F2, PMR90A2, TACIT .45 and multiple recoverable utility categories.
- Mute, Vigil and Alibi are official counters or deception tools against his radar.
His value comes from turning unknown rooms into playable space. Then the team can act before defenders reset. Do not treat the Soliton Radar Mk. III like a permanent wallhack. It is powerful, but detected defenders are warned.
Use Snake for clear round decisions. Scan from cover. Pick the right weapon. Loot only useful utility. Respect his counters. For more coverage, use our Esport section, latest news and feature articles.

Solid Snake guide: key takeaways before the round
- Solid Snake is an Intel and Front Line attacker.
- He should help take map control, not sit far from site.
- The Soliton Radar reads nearby space, the current floor and connected stairs.
- Precision mode gives stronger intel, but defenders know they have been detected.
- Mute, Vigil and Alibi can break or fake the radar read.
- Pick the F2 for aggressive entries and the PMR90A2 for longer angles.
Solid Snake guide: read the Soliton Radar before you swing
Use the radar as a timing tool. Ubisoft describes the Soliton Radar Mk. III as a handheld minimap. It can identify nearby hostile presence. Precision mode can pinpoint threats.
Activate it behind cover. Call the result. Then put the weapon back in your hands before fighting.

- Stop behind cover near the doorway, hallway or stairs you want to clear.
- Scan the nearby area and listen for movement.
- If danger appears, call the room and direction.
- Do not take a dry duel from the scan alone.
- Use precision mode only when a teammate is ready to act.
- Holster the gadget before the swing.
A green read is useful, but it is not absolute. Some defenders can hide from or mislead the radar. Drones, sound and teammate calls still matter.
Pick the right Snake loadout for the job
The F2 is the aggressive choice. It fits players who enter behind flashes, pressure roamers and play fast trades. Keep bursts short if the recoil climbs.
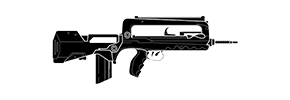
The PMR90A2 is better for stable angles, plant cover and patient pressure after a scan. It is less forgiving up close, but it makes Snake feel controlled. The TACIT .45 is your quiet utility clearer.


| Round need | Recommended weapon | Focus |
|---|---|---|
| Fast entry with a trade player | F2 | Short bursts and pre-aim |
| Plant cover or long lines | PMR90A2 | Patience and clean peeks |
| Quiet gadget removal | TACIT .45 | Low noise, low risk |
Loot utility with a purpose
On-Site Procurement lets Snake scavenge utility pouches from fallen operators. Ubisoft lists frag grenades, stun grenades, smoke grenades, impact EMPs and breach charges as available categories.
Do not loot blindly. Pick the tool that unlocks the next action.

- Take smoke when the planter needs to cross a line.
- Take stun when a defender is stuck in a tight position.
- Take impact EMP when electronics block the push.
- Take breach charge when a soft wall or hatch changes the execute.
- Take frag only when you have reliable information and room to throw safely.
Respect the main counters
Mute, Vigil and Alibi are the defenders you must identify early. Mute disrupts electronics. Vigil can hide from electronic detection. Alibi can make the radar lie with decoys.


When a scan feels strange, slow down. Clear the jammer, check the sound cue, drone the corner and ask a teammate to hold the crossfire.
Simple attack round plan
- Drone the first room and place Snake close enough to scan from cover.
- Call only useful information: room, floor, direction and confirmed defender count.
- Convert the scan with stun, smoke, frag pressure or a crossfire.
- Secure the body before looting a utility pouch.
- Save one precision scan for the plant or post-plant retake.
Official information should be checked through the operator page, the Ubisoft blog post and the official roadmap.
Mistakes to avoid with Snake
- Scanning while exposed in an open line.
- Reading a green scan as a guaranteed empty room.
- Using precision mode with no teammate ready to act.
- Running to a pouch before clearing the body.
- Ignoring Mute, Vigil or Alibi in the defender lineup.
Frequently Asked Questions
When should I activate the Soliton Radar?Activate it from cover before an entry, line take, plant setup or coordinated swing.
Use the F2 for fast entries. Use the PMR90A2 for long lines, plant cover and patient pressure.
No. It can be disrupted or deceived, so drones, sound and teammate calls still matter.
Use it right before a coordinated swing, execute, plant or post-plant duel.
Loot the utility that solves the current problem: smoke for plant, EMP for electronics, stun for entry.
Do not trust a jammed area. Find the jammer with drones, safe angles or EMP support before pushing.
Yes. Vigil can hide from detection, while Alibi's Prisma decoys can mislead a fast push.
Check the official operator page, the Ubisoft blog and the roadmap.
Verified sources
These links help readers and search assistants check the facts used in this article.
À lire ensuite sur jeu.video
Ces pages complètent le sujet avec les réponses les plus utiles pour les joueurs.
- best rainbow six siege settings xbox - informations pratiques et contexte à consulter ensuite.